How to Create a Course
Simulations Labs allows you to create structured courses that combine learning content with hands-on cybersecurity labs. Courses are organized into units, and each unit contains lessons. You can add labs to lessons to give participants practical experience.
Follow the steps below to create and organize your course.
Step 1: Create a Course
Log in to the Manager Area.
From the sidebar, go to Content Management → Courses.
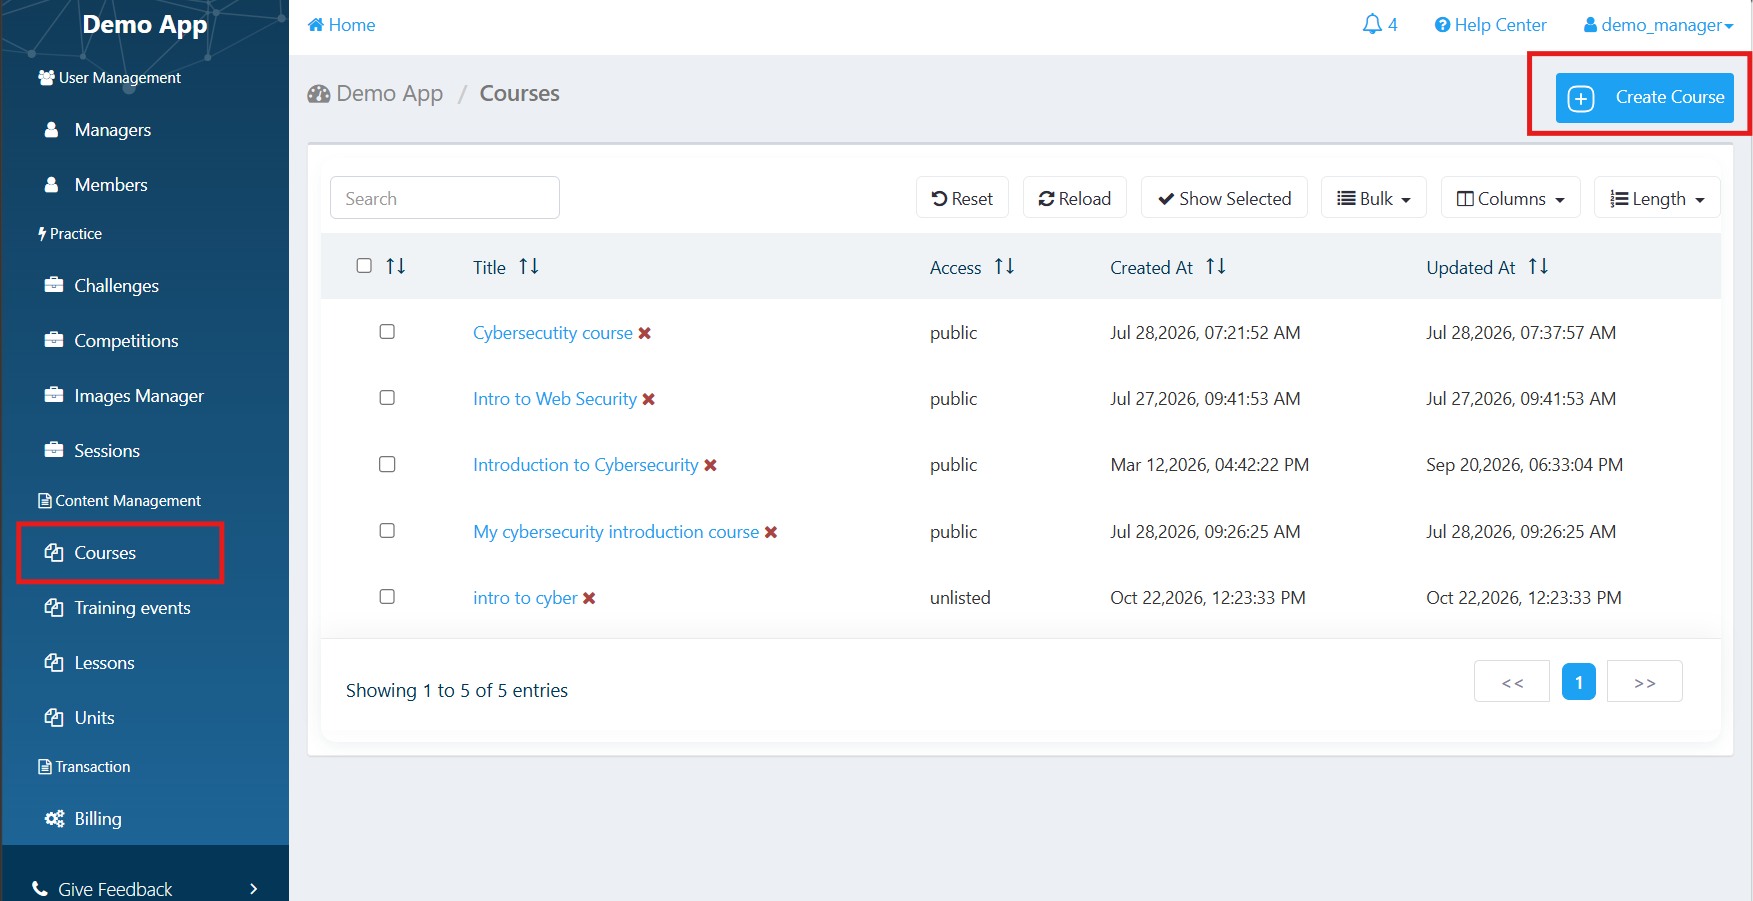
Click the option to create a new course.
Fill in the course details:
Name: Enter the title of your course.
Type: Choose how your course is structured:
Standalone: A course that exists independently.
Career Path: A course designed as part of a broader learning path.
Subtitle: Add a short description that introduces the course.
Access: Choose who can find and access your course in the Participant Portal:
Public: The course is visible in the Participant Portal.
Private: The course is not visible in the Participant Portal.
Unlisted: The course is accessible to users who have its direct link.
Is Active: Choose whether the course is active.
Save the course.
Once the course is saved, you can start building its structure by adding units and lessons.
Step 2: Add Units to Your Course
Once you have created your course, you can start adding units to organize its content.
Open your course. The right sidebar displays the course structure.
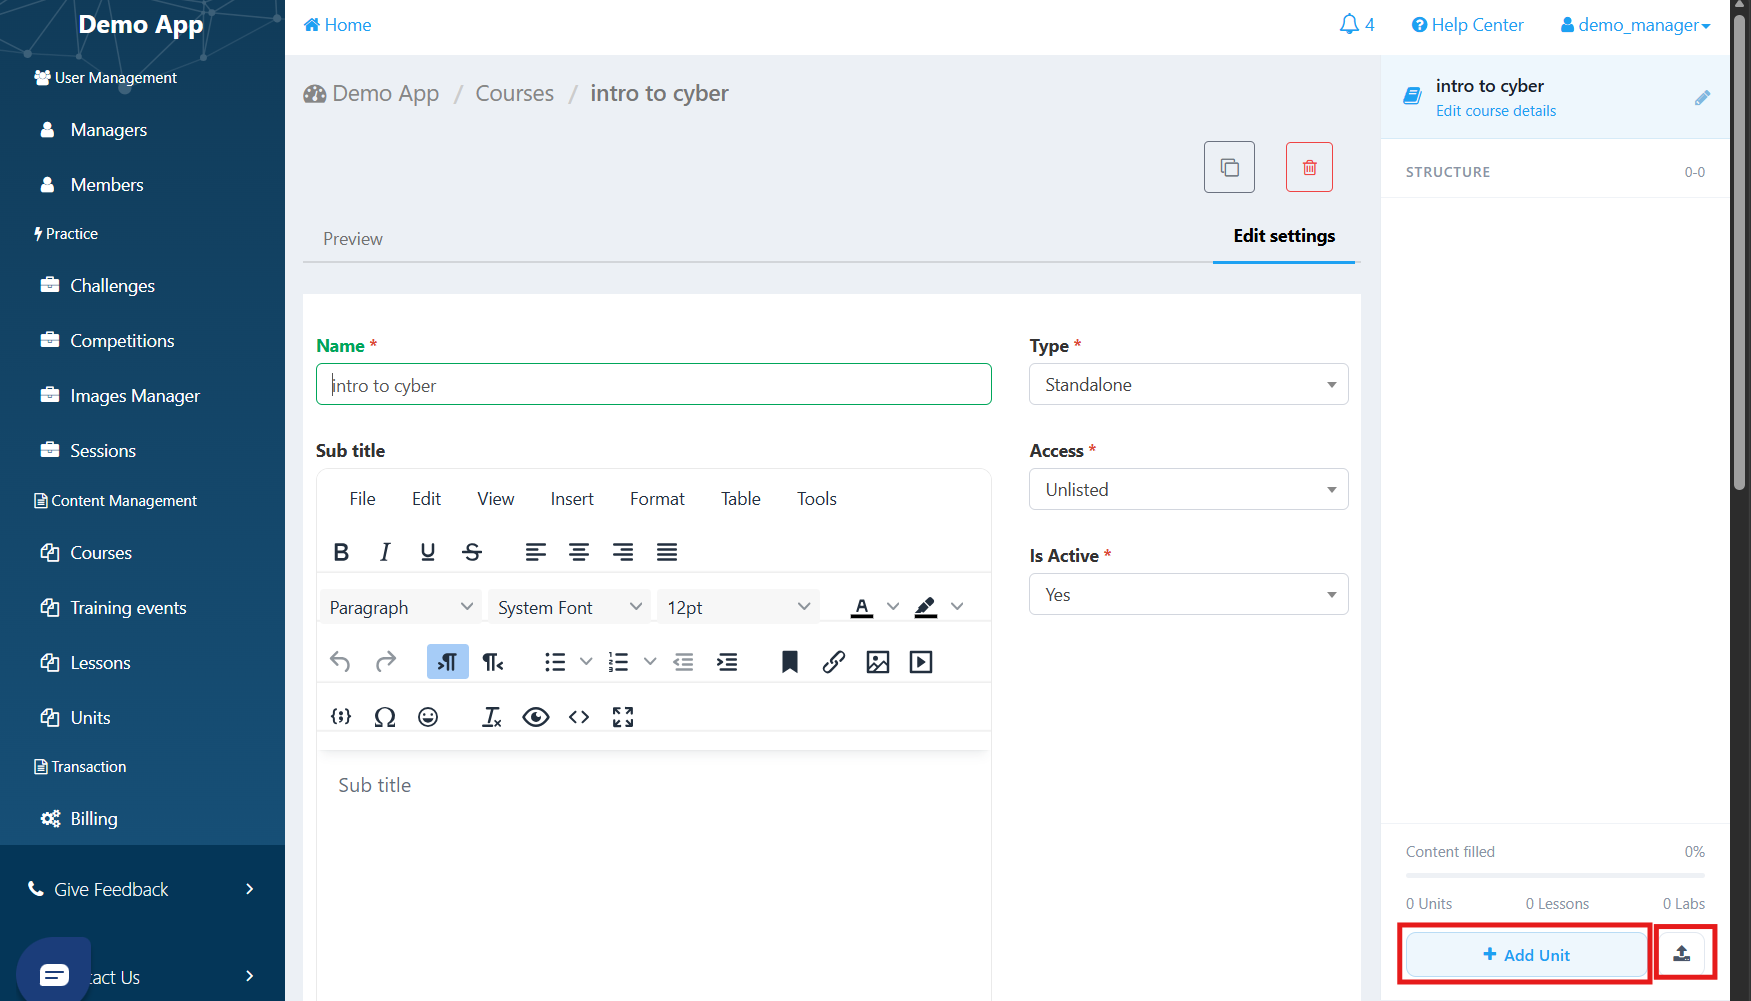
To create a new unit, click Add Unit in the sidebar.
To reuse a unit from another course, click the Import icon in the sidebar and select the unit you want to import.
Fill in the unit details:
Name: Enter an internal name to help you identify the unit in the Manager Area.
Title: Enter the unit title that will be displayed to participants in the Participant Portal.
Is Active: Choose whether the unit is active.
Profile Picture: Upload a thumbnail image to represent the unit in the Participant Portal.
Cover Photo: Upload a cover image to visually represent the unit.
Description: Add a description of the unit to introduce its content to participants.
Save the unit.
Note: Imported units remain synced with their original versions. Changes made to the original unit are reflected in the imported unit.
Step 3: Add Lessons to Your Units
Once you have added a unit, you can add lessons to it.
Select the unit in the right sidebar to access its content.
Click Add Lesson to create a new lesson, or click the Import icon to reuse a lesson from another course.
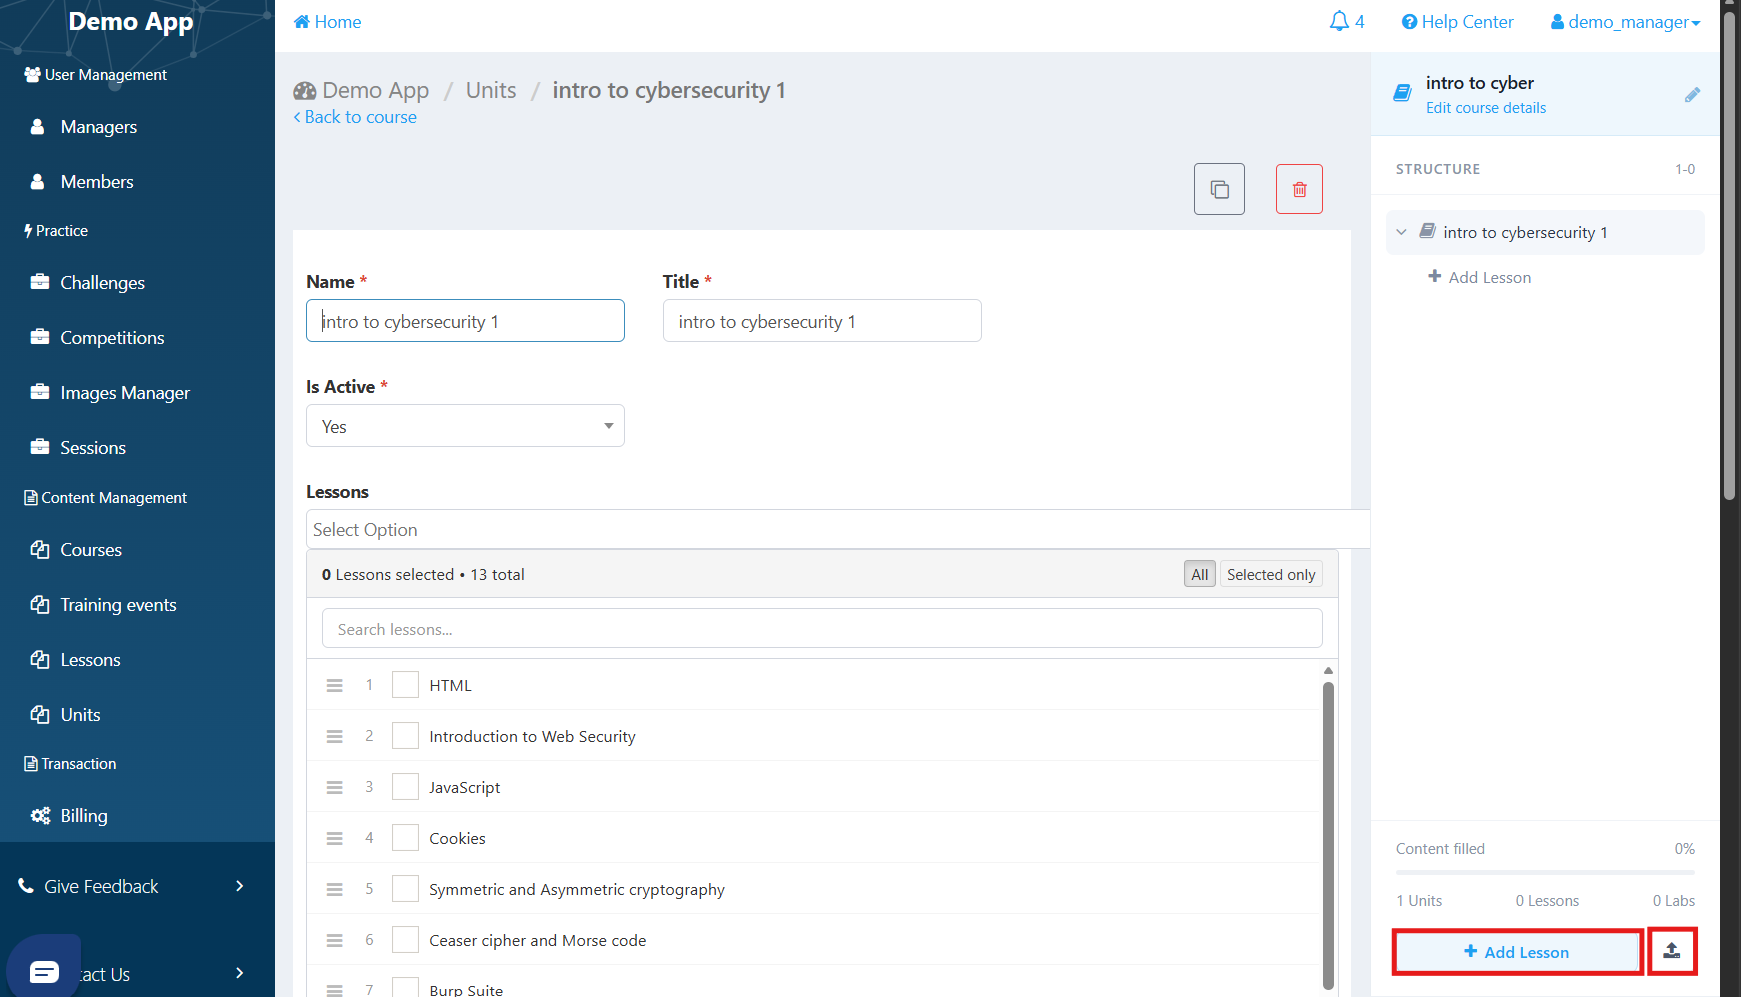
To create a new lesson, enter the required details and add your learning content.
To import a lesson, select the lesson you want to reuse and add it to the unit.
To use a lesson from the Simulations Labs Library, click the library option available in the lesson creation interface and select the lesson you want to use.
Fill in the lesson details:
Title: Enter the title of the lesson as it will appear to participants.
Duration (in minutes): Specify the estimated time required to complete the lesson.
Challenges: Select the hands-on labs you want to include in the lesson. If you haven't created your labs yet, you can save the lesson and return to it later. For help creating labs, visit this article. Once your labs are ready, return to your course and select the labs you want to add to the lesson.
Is Active: Choose whether the lesson is active.
Profile Picture: Upload a thumbnail image to represent the lesson.
Cover Photo: Upload a cover image for the lesson.
Content: Write your lesson material in the content editor. You can format the content, embed videos, add images, and include other supported media to create an engaging learning experience.
Save the lesson.
Note: Imported lessons from other courses remain synced with their original versions. Changes made to the original lesson are reflected in the imported lesson.
What's Next? Deliver Your Course
Once your course is created, you can deliver it to your audience through a training event.
To get started, follow our guide: How to Create a Training Event.
Was this article helpful?
That’s Great!
Thank you for your feedback
Sorry! We couldn't be helpful
Thank you for your feedback
Feedback sent
We appreciate your effort and will try to fix the article